Purpose:
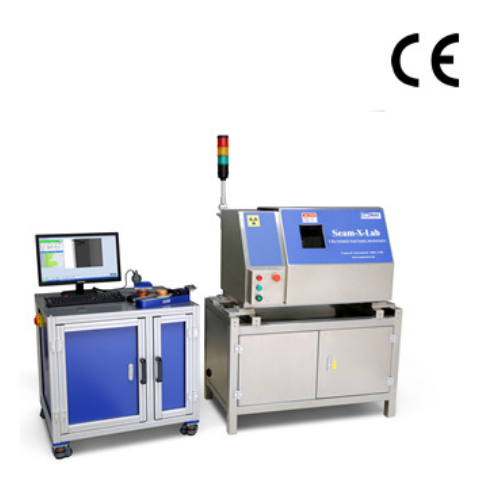
Seam-X®-Lab Automatic Seam Scanner adopts non-destructive measure method to measure the seam dimension, tightness (aluminum and tin composite can excluded), and the actual seam formation.
Measure Items:
Seam Length, Body Hook, End Hook, Overlap, %Overlap, Seam Gap, %Body Hook Butting, %End Hook Butting, %Tightness, and the actual seam formation. It is able to identify if the double seam is fake or not base on the actual seam formation It’s applicable to measure cans of various materials.
Combination of can body and the end can be following:
(1) Aluminum & Aluminum;
(2) Tin & Tin;
(3) Tin & Aluminum.
Seam-X®-Lab can work together with the seam thickness gauge and countersink gauge, to make up a complete measure system for the double seam.
Principle X-Ray decreases after going through the material. Decrement is in proportion to the density of the material. Decrement is in proportion to the thickness of the material. CanNeed-Seam-X®-Line, X-Ray Automatic Seam Scanner, adopts the principle that absorbility of X-Ray is different for material of different density and thickness, penetrating and imaging the structure of easy open can. Software processes the image and measure the seam structure.
Measure Process Take a batch of samples from after the seamer. Put the sample onto the measure station of Seam-X®-Lab. Software controls the whole measure process. Sample is rotated automatically and its seam is scanned by X-ray for a circle (360°) to obtain the image. Software analyzes the image automatically after image obtained. The whole process takes less than 1 minute. It measures the seam dimension, %tightness and virtual seam formation.
Features & Functions:
1) Waste no sample, save cost and environmental protection.
2) Auto measure, quick and efficient, simple operation
3) More accurate, avoid manual measurement error
4) Outstanding repeatability and reproducibility (R&R)
5) 360° fully scan measurement of tightness
6) Invention patents granted
7) Comply with safety criteria of X-ray radiation protection, certified by the third party (0.08mSV/year).
8) Safe operation to avoid injury result from cutting method
9) Easy calibration with provided calibration piece
10) Suitable for cans of various sizes and specification
11) Software automatically open and close the protection door
12) Automatic judge passed or failed
13) Welding identifying function for 3-piece can (Optional)
14) Measure data can be stored in SPC automatically
Software Function for Seam-X®
1) Able to set various series of inspecting standard, can judge and warn automatically whether the results are qualified in every measure
2) Report format can be customized, flexible for different report styles of different companies
3) Software adopted data base management system, measurement results and images are saved in the data base, users can facilitate inquires
4) Various graphs for data statistics and analysis
5) Users can review or re-measure the saved projects at any time
6) Data can be exported as an Excel file
7) Seam image can be printed and stored, facilitate communication with the production department or canning factories, no need to retain the sample cans
8) Users can calibrate at any time and set the calibration password
1) Waste no sample, save cost and environmental protection.
2) Auto measure, quick and efficient, simple operation
3) More accurate, avoid manual measurement error
4) Outstanding repeatability and reproducibility (R&R)
5) 360° fully scan measurement of tightness
6) Invention patents granted
7) Comply with safety criteria of X-ray radiation protection, certified by the third party (0.08mSV/year).
8) Safe operation to avoid injury result from cutting method
9) Easy calibration with provided calibration piece
10) Suitable for cans of various sizes and specification
11) Software automatically open and close the protection door
12) Automatic judge passed or failed
13) Welding identifying function for 3-piece can (Optional)
14) Measure data can be stored in SPC automatically
Sample spec.: Combination of can body and the end can be following:
(1)Aluminum & Aluminum;
(2)Tin & Tin;
(3)Tin & Aluminum
Sample size:
• Can Diameter: 113 (48 mm)-603 (153 mm);
• Can Height: 50- 300mm
Unit: Dimension: inch, mm;
Tightness: %
Language: English & Chinese
Accuracy: Seam Dimension: +/- 0.01 mm
Tightness: +/- 5%
Resolution: Seam Dimension: 0.001 mm
Tightness: 1%
Output: Ethernet, ASCII, TXT, SQL, DBI
Power: 100-240VAC, 50/60 Hz
Dimension: L1500×W1000×H1900mm
Weight: Approx. 650kg